Getting Started
This section covers installation of the SDK, accessing an xPico 200 series device, and a quick start guide to help you build and deploy your first application.
Install the SDK
Windows Specifications:
The SDK has been tested with the following PC specifications.
- Operating System: Windows 7
- CPU: Intel Core 2 Quad CPU Q8300 @ 2.50GHz
- RAM: 4.0 GB
- Free disk space: 1 GB or more is recommended
Linux Specifications:
The SDK has been tested with the following PC specifications.
- Operating System: Ubuntu 16.04 (Ubuntu 16.04 or 18.04 is recommended.)
- CPU: Intel Core 2 Quad CPU Q8300 @ 2.50GHz
- RAM: 4.0 GB
- Free disk space: 1 GB or more is recommended
Important
Always back up your custom code in the custom/module directory when updating or reinstalling the SDK.
Install the Windows SDK in Windows 7
To install the SDK in Windows:
- Download the latest version of the SDK installation file from the Lantronix SDK website.
- Double-click the file to launch the InstallShield Wizard.
- Click Next.
- Select I accept and then click Next.
- Click Install. If prompted, click Yes to allow the program to make changes to your computer.
- The InstallShield Wizard installs the SDK at
C:/xPico200. This process could take a few minutes. When the installation is complete, click Finish.
Install the Linux SDK in Ubuntu
To install the SDK in Linux:
- Download the latest version of the SDK installation file.
- Extract the .tar file into a new directory. This is referred to as the installation directory in this document.
- From the command line, navigate to the installation directory and type
./install_environment.shto install the necessary packages.
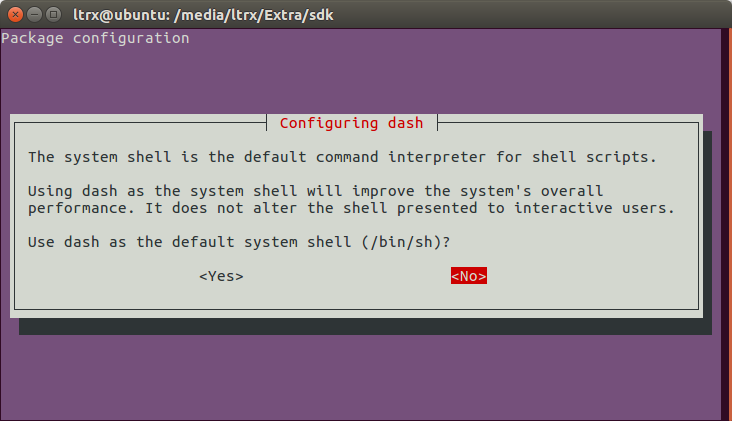
- Type
sudo dpkg-reconfigure dashfrom the command line.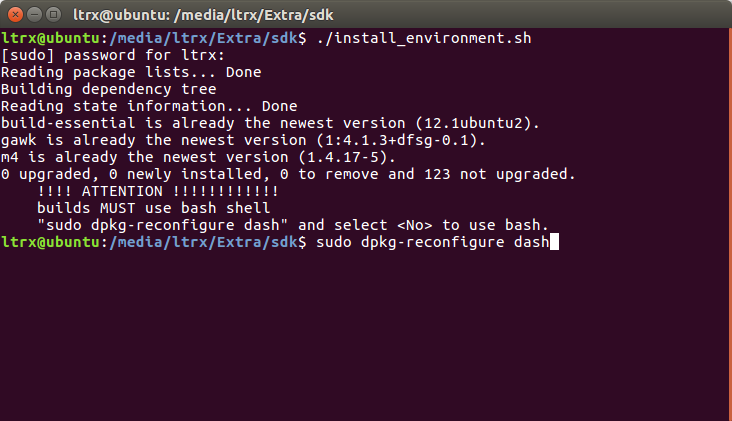
- Select <No> to use bash.
Access the Device
There are three ways to access the xPico 200 series device:
- The Web Manager application provides browser-based access to all features.
- The Web API provides access to all features through standard HTTP requests.
- The CLI provides access to all configuration options, but keep in mind you cannot upload custom firmware via the CLI.
The examples in this section use Web Manager to upload custom firmware to the xPico 200 device. Refer to the xPico 200 Series User Guide for more information on accessing the device.
Build and Deploy Firmware
These quick start guides provide a high-level walkthrough of building and deploying the Hello World and the Line Echo demo applications. The purpose of these guides is to quickly demonstrate the overall process for building ROM files and uploading them to an xPico 200 device.
Quick Start: Hello World
The helloDemo module contains code that prints "Hello World" to the command line once every two seconds when the firmware is loaded onto the xPico 200 device.
Step 1: Build the project
To build the project in Windows:
- Go to the SDK installation directory. By default, this is
c:/xPico200/. - Double-click MinGW-shell to open a MinGW window.
- Change to the helloDemo project directory within the installation directory.
cd /c/xPico200/custom/project/helloDemo/ - Type
maketo build the project. The terminal window reports the image summary when the project compiles successfully.
   Image Summary (Partition size is 0x1E0000):
      Flash Usage: 1208112 of 1966080 (61%, 757968 remaining)
      SRAM Usage: 631024 of 2097152 (30%, 1466128 remaining)
To build the project in Linux:
- Go to the SDK installation directory. This is where you extracted the .tar file previously.
- Change to the helloDemo project directory within the installation directory.
cd custom/project/helloDemo - Type
maketo build the project. The terminal window reports the image summary when the project compiles successfully.
   Image Summary (Partition size is 0x1E0000):
      Flash Usage: 1208112 of 1966080 (61%, 757968 remaining)
      SRAM Usage: 631024 of 2097152 (30%, 1466128 remaining)
Step 2: Sign the ROM
This step depends on whether your signed public key has been written to the device.
If you have not written your signed public key to the device:
Follow the process described in the one-time actions section under Development Workflow. Use your built project as your firmware.
If you have already written your signed public key to the device:
Run the Lantronix image signing tool using the command ltrx-signimage-win64.exe oem_rsa_key.priv helloDemo_<version>.rom helloDemo_<version>.signed.rom in Windows or by using the command ltrx-signimage-linux, which is located in the <SDK directory>/lantronix/bin directory, in Linux. The signing tool produces a ROM file signed with your private key. The signed ROM file looks similar to helloDemo_<version>.signed.rom.
Step 3: Upload the ROM
Now upload the signed ROM file you just built.
- Open Web Manager, go to the Device page, and click Firmware Upgrade.
- Click Choose File, browse to
work/helloDemo, and select the signed ROM file. - Click Upload and then click OK to confirm that you want to upload a new firmware image. The device erases the old image and receives and writes the new image. After the new firmware is written, the device reboots automatically. It may take a few minutes for this process to complete.
Step 4: Change Line 1 Protocol
Next, change Line 1 to the new Hello World protocol you just uploaded.
- In Web Manager, go to the Line page and click Configuration.
- From Protocol, select Hello World and then click Submit. The changes take effect immediately.
- Open a terminal emulator (e.g. Tera Term) and connect to the COM port the device is connected to. The xPico 200 prints "Hello World" to the terminal once every two seconds.
Hello world
Hello world
Hello world
Quick Start: Line Echo
The echoDemo module contains code that reads each character from the input buffer and prints it back to the line when the firmware is loaded onto the xPico 200 device.
Step 1: Build the project
To build the project in Windows:
- Go to the SDK installation directory. By default, this is
c:/xPico200/. - Double-click MinGW-shell to open a MinGW window.
- Change to the echoDemo project directory within the installation directory.
cd /c/xPico200/custom/project/echoDemo/ - Type
maketo build the project. The terminal window reports the image summary when the project compiles successfully.
   Image Summary (Partition size is 0x1E0000):
      Flash Usage: 1208112 of 1966080 (61%, 757968 remaining)
      SRAM Usage: 631024 of 2097152 (30%, 1466128 remaining)
To build the project in Linux:
- Go to the SDK installation directory. This is where you extracted the .tar file previously.
- Change to the echoDemo project directory.
cd custom/project/echoDemo - Type
maketo build the project. The terminal window reports the image summary when the project compiles successfully.
   Image Summary (Partition size is 0x1E0000):
      Flash Usage: 1208112 of 1966080 (61%, 757968 remaining)
      SRAM Usage: 631024 of 2097152 (30%, 1466128 remaining)
Step 2: Sign the ROM
This step depends on whether your signed public key has been written to the device.
If you have not written your signed public key to the device:
Follow the process described in the one-time actions section under Development Workflow. Use your built project as your firmware.
If you have already written your signed public key to the device:
Run the Lantronix image signing tool using the command ltrx-signimage-win64.exe oem_rsa_key.priv echoDemo_<version>.rom echoDemo_<version>.signed.rom in Windows or by using the command ltrx-signimage-linux, which is located in the <SDK directory>/lantronix/bin directory, in Linux. The signing tool produces a ROM file signed with your private key. The signed ROM file looks similar to echoDemo_<version>.signed.rom.
Step 3: Upload the ROM
Now upload the signed ROM file you just built.
- Open Web Manager, go to the Device page, and click Firmware Upgrade.
- Click Choose File, browse to
work/echoDemo, and select the signed ROM file. - Click Upload and then click OK to confirm that you want to upload a new firmware image. The device erases the old image and receives and writes the new image. After the new firmware is written, the device reboots automatically. It may take a few minutes for this process to complete.
Step 4: Change Line 1 Protocol
Next, change Line 1 to the Echo protocol option you just uploaded.
- In Web Manager, go to the Line page and click Configuration.
- From Protocol, select Echo and then click Submit. The changes take effect immediately.
- Open a terminal emulator (e.g. Tera Term) and connect to the COM port the device is connected to. For each character received on the line, the xPico 200 prints the character back to the line. Note that the Line returns each character immediately when you press a key.