Getting Started
You can connect to your XPort EDGE Embedded Ethernet Gateway to begin configuring it in a few simple steps.
How do you want to connect?
- Connect to the Web Manager. Use this method to connect with a web browser over Ethernet.
- Connect to the Serial Terminal. Use this method to connect to the serial port and access the Command Line Interface (CLI).
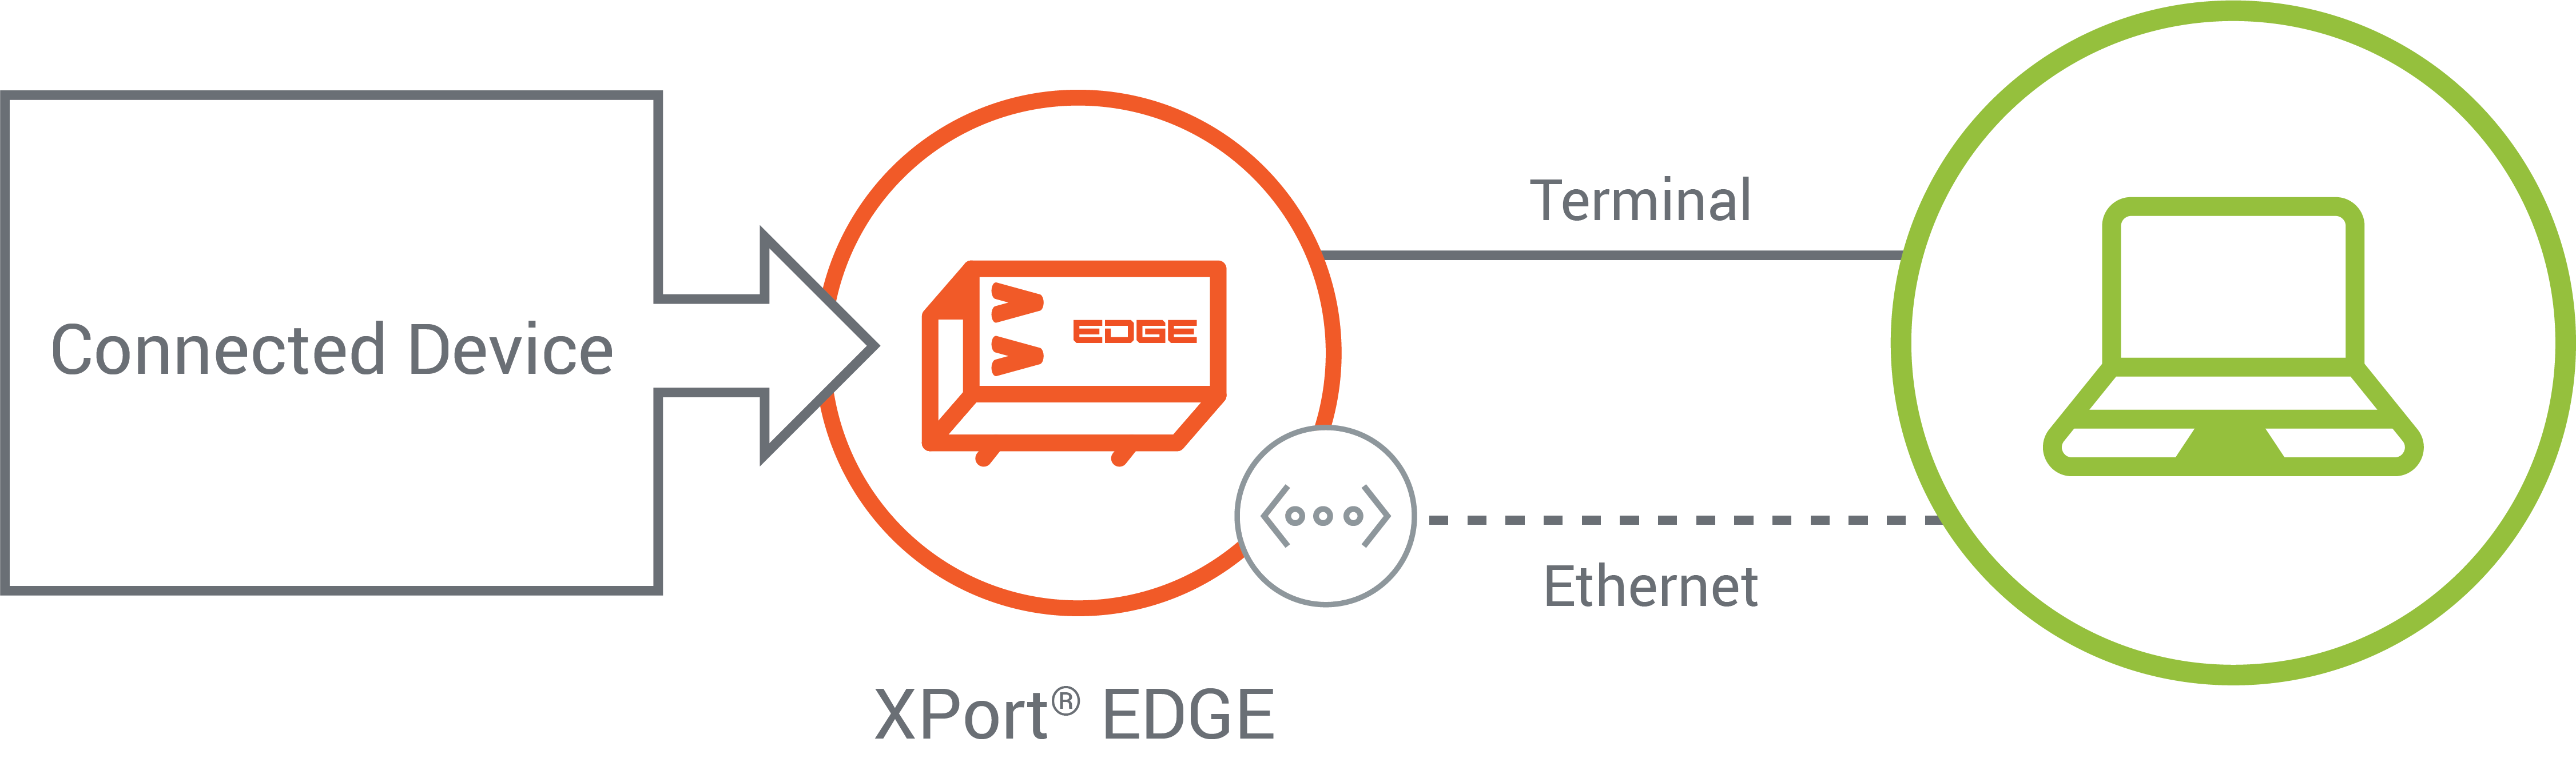
What do you need?
Your device or your evaluation board with the gateway attached and powered on.
Depending on how you want to connect, you also need one of the following:
- For network connection, a PC with web browser to connect to the gateway using Ethernet.
- For serial connection, a PC with serial terminal connected to the device UART Line 1.
Connecting to the Web Manager
STEP 1: OBTAIN THE IP ADDRESS
- Connect your gateway via Ethernet to your PC's network.
- Use the Lantronix Provisioning Manager application to discover the gateway and learn the IP address. To download Lantronix Provisioning Manager, go to https://www.lantronix.com/products/lantronix-provisioning-manager/.
- Note the IP address of the embedded gateway.
STEP 2: CONNECT TO WEB MANAGER
- Connect to the IP address noted in the previous step using your web browser.
- Use the default USER ID = admin and Password = PASSWORD (both case sensitive).
STEP 3: COMPLETE THE CONFIGURATION
Continue with the rest of the unit configuration using the Web Manager UI.
Some configuration options available to you at this point include the following:
- Factory reset the XPort EDGE to get it to a known configuration.
- Get the latest firmware version.
- Configure essential applications such as TruPort Serial or TruPort Socket.
- Secure your device.
Connecting to the Serial Terminal
You can configure the gateway using the Command Line Interface (CLI) via the serial port.
STEP 1: CONNECT TO THE SERIAL TERMINAL
-
Connect a PC running a terminal emulator application such as Tera Term to the device UART and power on the device.
-
In the terminal application, configure a new serial connection to the COM port associated with the XPort EDGE unit.
-
Set up the serial port communication parameters in the terminal to match the settings on the XPort EDGE unit. Click OK.
- Baud rate: 9600
- Data: 8 bits
- Parity: none
- Stop bits: 1 bit
- Flow control: none
-
Once you have connected to the serial terminal, type
?in the terminal to view the root level of the CLI.
>?
config                                  documentation
file system                             help
status                                  tlog
xml                                     exit
To begin configuring the gateway, type the following commands:
config<enter>to enter the "config" level?<enter>to display the "config" level commands
The following example shows "config" level commands:
config

config>?
exit                                    write
Clock                                   CPM
Ethernet                                HTTP Server
Interface                               Line <instance>
User <instance>                         AES Credential <instance>
CLI Server                              Discovery
Mach10                                  Modem Emulation <instance>
Monitor                                 NTP
TLS Credential <instance>               Tunnel <instance>
Custom <instance>
STEP 2: CONFIGURATION USING THE CLI
Continue with the rest of the unit configuration using the CLI.
Some configuration options available to you at this point include the following:
- Factory reset the gateway to get it to a known configuration.
- Get the latest firmware version.
- Configure essential applications such as TruPort Serial or TruPort Socket.
Performing a Firmware Update
For the latest firmware download, visit https://www.lantronix.com/support/downloads.
Use the Web Manager to update your firmware to the latest version for your gateway.
To use the Web APIs to upgrade firmware, see Upgrade Firmware in the Web API Reference.
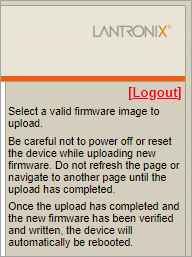
To update the firmware:
- Download the latest firmware from the product website.
- Open the Web Manager to the IP address of your XPort EDGE.
- Go to Device > Firmware Upgrade.
- Click Choose File to find the firmware file and then click Upload. Wait while the gateway uploads the firmware. The gateway will be rebooted after the upload has completed.
- When prompted, enter your user name and password into Web Manager. You can verify the firmware version on the Status page.
Performing a Factory Reset
A factory reset will return variables to the default configuration and ensure that the gateway is in a known state.
You can perform a factory reset on the gateway using the following interfaces:
- Web Manager
- CLI
- Web API
In the Web Manager, go to Device > Status > Factory Defaults. Confirm that you want to reload factory default settings.
In the CLI, navigate to the "status Device" level and run Factory Defaults. Confirm that you want to reload factory default settings.
status Device>Factory Defaults
CONFIRM: Reload factory default settings? (okay/cancel)Okay
WARNING: Rebooting for factory defaults...

Command Line started.

>
Use the Device Actions Web API to send an HTTP request to the device to "take status action" to reset the gateway to factory defaults. For details, see the Web API Reference.
Configuring Essential Applications
If you are integrating with the gateway via one of the serial interfaces, you have the following options:
-
Use TruPort Serial to establish tunnel connections that support transparent transport of serial protocols with the ability to tune the connection parameters for a specific protocol without requiring custom software programming.
-
Use TruPort Socket to establish tunnel connections with multiple data channels with fine-grained control over the channels.
Getting Help
In addition to the online documentation provided on this website, the gateway provides interactive help within the Web Manager and CLI.
Web Manager Help
The Web Manager provides context-sensitive help inline within the user interface.
CLI Help
The CLI help provides contextual help that contains details about how to navigate the CLI as well as command-level descriptions.
To view the general help commands, type help at the root level.
>help
COMMAND LINE INTERFACE HELP


<tab>          fill in possible command
<enter>        run command as edited
*<enter>       show help on matching commands
?              list matching commands
<left arrow>   move cursor left
<right arrow>  move cursor right
<up arrow>     previous command
<down arrow>   later command
<backspace>    delete to left
<delete>       delete to left
<Paste XML>    import configuration

<control>                          <escape>
---------------------------------  ----------------------------------
a  move cursor to begin of line    b        move cursor backward word
d  delete character under cursor   f        move cursor forward word
e  move cursor to end of line      [A       previous command
k  delete to end of line           [B       later command
l  redraw line                     [C       move cursor right
r  redraw line                     [D       move cursor left
u  delete to begin of line         <escape> delete word to left
w  delete word to left
To view the Command Reference, see CLI Reference.
Technical Support
For technical support queries, visit https://lantronix.com/support/.